Redirects
Framer and non-Framer sites both use this approach for redirects.
Split URL testing is a way to implement an A/B test by redirecting visitors to different versions of a page, each with their own URL.
Creating redirects
Open the Visual Editor by clicking Edit under the variant name in the Experiences view:

Navigate to the path you want to redirect from.
Change mode to Edit. In the right menu, select Redirect then + Add redirect.
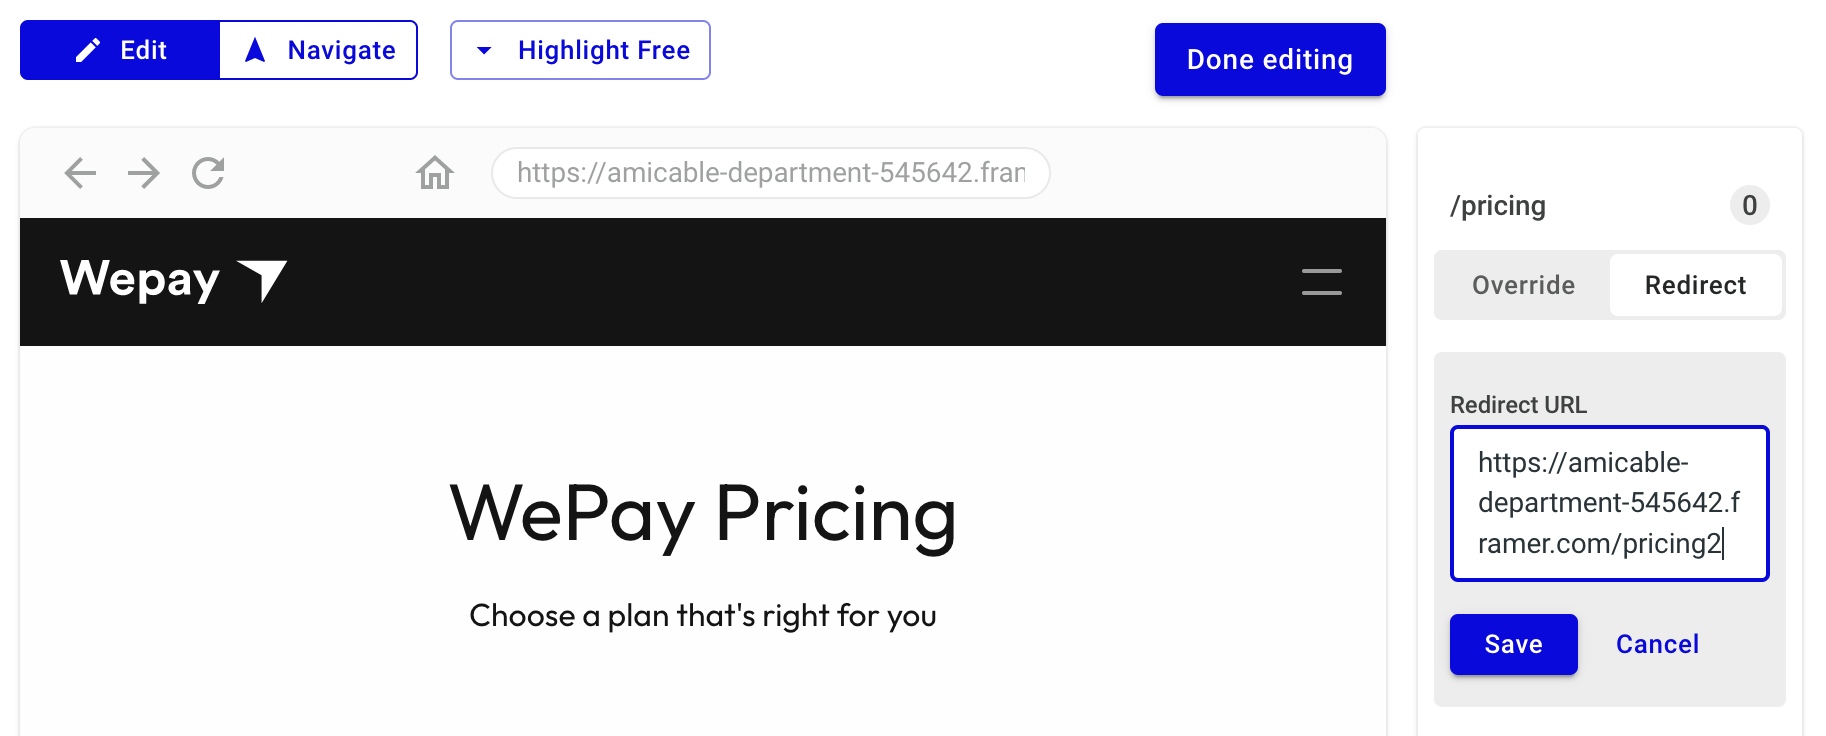
Enter the full url (e.g. https://yoursite.com/page2) that you want to redirect to. Save.
Repeat for every variant you want to include in your experiment.
Anti-flicker
Framer and non-Framer sites require the anti-flicker snippet for redirects.
- Framer
- Other Website
To install the anti-flicker snippet on your Framer site, navigate to the Page Settings tab, choose the originating page of the redirect, then go to Custom Code.
Avoid the mistake of choosing the general site settings. This will install the anti-flicker snippet on every page.
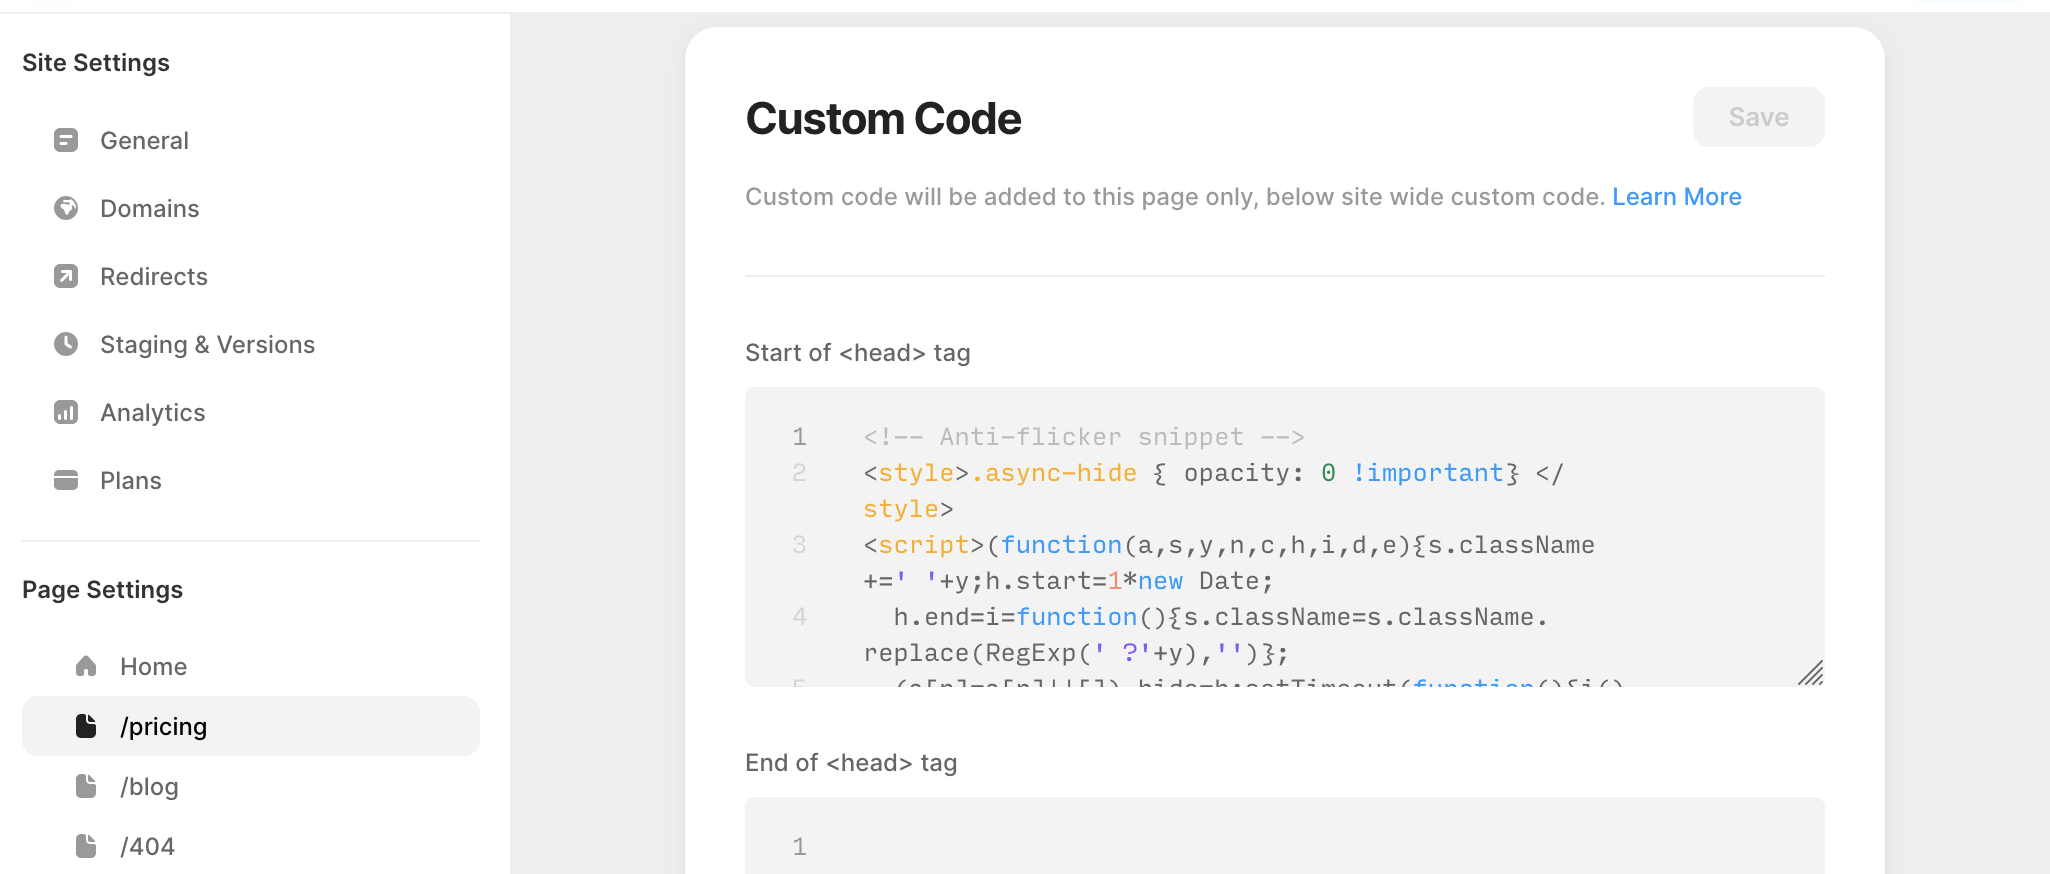
Copy-paste the anti-flicker snippet into the Start of <head> tag section. Click Save.
If the anti-flicker snippet is already installed site-wide, you're all set.
If not, follow the instructions here to install either on your entire site or on the originating page of the redirect only.
Validating
Preview links work for redirects as they do for any other experience. Click the preview link for your variant, navigate to the originating path. You will be redirected to the destination path.